A música é uma forma de arte que possibilita a expressão de emoções e pensamentos de maneira única e pessoal. No entanto, muitas vezes, os músicos se sentem presos a padrões e regras, buscando sempre seguir uma partitura ou uma sequência pré-estabelecida. É aí que entra o poder da improvisação, uma técnica que permite a liberdade de expressão musical e a criação de novas melodias e harmonias. Neste artigo, vamos explorar como a improvisação pode ser uma ferramenta poderosa para liberar a criatividade musical e tornar a música ainda mais emocionante e surpreendente.
Improvisação na música: essencialidade explicada.
A improvisação na música é uma habilidade essencial para qualquer músico que deseja expandir sua criatividade e liberdade musical. A capacidade de improvisar permite que o músico crie e desenvolva novas ideias musicais em tempo real, sem a necessidade de seguir uma partitura ou um arranjo pré-definido.
A improvisação pode ser aplicada em diferentes gêneros musicais, desde jazz e blues até rock e música eletrônica. É uma forma de expressão artística que permite aos músicos se conectarem uns com os outros e com o público, criando um ambiente de interação e experimentação.
A improvisação requer um conjunto de habilidades técnicas e musicais, como conhecimento de escalas, acordes e ritmos, além de uma boa sensibilidade musical e capacidade de ouvir e responder aos outros músicos. É uma prática que envolve riscos e incertezas, mas também pode levar a momentos musicais emocionantes e inesperados.
É uma forma poderosa de expressão musical que permite aos músicos explorar novas ideias e possibilidades musicais em tempo real.
Tipos de improvisação musical.
A improvisação musical pode ser dividida em diferentes tipos, cada um com suas características específicas. Conhecer esses tipos pode ajudar músicos a expandir sua habilidade de improvisar e a se comunicar melhor com outros músicos durante uma performance.
Improvisação livre
A improvisação livre é caracterizada pela ausência de regras ou estruturas pré-determinadas. Os músicos podem fazer o que quiserem, sem se preocupar com acordes, escalas ou ritmos. Essa forma de improvisação é geralmente utilizada em contextos experimentais ou avant-garde.
Improvisação baseada em acordes
Nesse tipo de improvisação, o músico utiliza os acordes da música como base para criar uma melodia. Ele pode escolher diferentes escalas e arpejos que se encaixem com os acordes para criar uma improvisação coesa e harmoniosa.
Improvisação baseada em escalas
A improvisação baseada em escalas é quando o músico utiliza uma escala específica como base para criar sua improvisação. Ele pode escolher diferentes acordes que se encaixem com a escala para criar uma harmonia, mas a improvisação em si é baseada na escala escolhida.
Improvisação baseada em formas
Nesse tipo de improvisação, o músico utiliza formas pré-determinadas, como blues ou jazz, como base para criar sua improvisação. Ele pode escolher diferentes acordes e escalas que se encaixem com a forma escolhida, mas a improvisação em si é baseada na estrutura da música.
Improvisação temática
A improvisação temática é quando o músico utiliza um tema específico como base para criar sua improvisação. Esse tema pode ser uma melodia, uma frase ou um ritmo. O músico pode então desenvolver esse tema em sua improvisação, adicionando variações e ornamentações.
A Arte do Desenho a Carvão: Texturas e Contrastes
Conceito de improvisação: Exploração Criativa.
O conceito de improvisação se baseia na habilidade de criar e desenvolver ideias musicais em tempo real, sem a necessidade de uma partitura ou script pré-estabelecido. A improvisação é uma técnica utilizada em diversos gêneros musicais, desde o jazz até o rock, passando pelo blues e pelo funk.
A improvisação requer uma exploração criativa, ou seja, a capacidade de experimentar diferentes ideias musicais e desenvolver novos caminhos sonoros. A improvisação não se limita apenas às notas musicais, mas pode envolver também o uso de diferentes timbres, texturas e dinâmicas.
Para improvisar, é necessário ter um bom conhecimento teórico e técnico da música, além de uma grande dose de criatividade e sensibilidade musical. A improvisação permite que o músico se expresse de maneira única e autêntica, criando uma experiência musical única para si mesmo e para o público.
Entendendo a Improvisação Livre
A improvisação livre é uma técnica musical que consiste em criar melodias e harmonias espontaneamente, sem seguir uma estrutura pré-definida. Ela é comumente utilizada em gêneros musicais como o jazz, blues e rock, onde os músicos têm a liberdade de explorar seu próprio estilo e expressão.
Para entender a improvisação livre, é preciso ter conhecimento das escalas musicais e dos acordes utilizados na música em questão. A partir daí, o músico pode criar suas próprias variações e combinações, criando o seu próprio som.
Um dos principais benefícios da improvisação livre é a capacidade de desenvolver a criatividade musical e a capacidade de se adaptar a diferentes situações musicais. Além disso, ela permite que os músicos se expressem de forma autêntica e única, tornando cada apresentação única e memorável.
O Poder da Improvisação: Descubra sua Criatividade Musical
Concluímos que a improvisação é uma habilidade fundamental para qualquer músico que busca liberdade criativa e expressividade musical. Através da prática constante, é possível desenvolver técnicas e estratégias para improvisar com confiança e fluência, ampliando as possibilidades sonoras e emocionais da música. Não deixe de explorar o poder da improvisação em sua jornada musical!
A improvisação é uma das habilidades mais valiosas e emocionantes que um músico pode desenvolver. Quando você improvisa, está criando música em tempo real e se conectando com o momento presente de uma forma única e poderosa. Ao liberar sua criatividade musical por meio da improvisação, você pode descobrir novos sons, ideias e possibilidades que nunca imaginou antes. Além disso, a improvisação pode ajudar a melhorar sua técnica, sua capacidade de ouvir e responder a outros músicos e a sua confiança no palco. Então, se você quer se tornar um músico mais completo e expressivo, comece a explorar o poder da improvisação hoje mesmo!


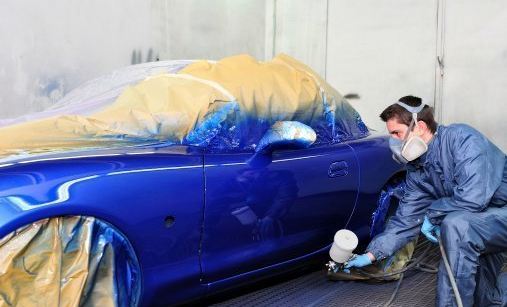
 Existem diversos tipos de pintura, como os afrescos, pintura a óleo, através de pigmentos diluídos em um solvente; pintura mural, feita ou aplicada sobre uma parede; pintura a temperatura, pigmentos dissolvidos em um estíptico, como a cola.
 Você acha que a arte de desenhar é um dom ou é alguma coisa que deve ser aprendido?